Connect Your AI Assistant
Step 2 Add the server to your AI assistant and paste your token.
Setup via Agent
Have your AI assistant set everything up automatically. Copy the prompt below, replace YOUR_PAT_HERE with your GitLab token, and paste it into your AI assistant's chat.
This auto-setup is for convenience. For production use, the Manual Setup path below is recommended — it stores your token in a local config file rather than chat history.
Configure an MCP server in my AI assistant. This is a self-hosted GitLab MCP
server connected to our internal GitLab instance.

Server URL: https://gitlab-mcp.pyja.in/mcp
Transport: HTTP
Authentication: Bearer token
My GitLab PAT: YOUR_PAT_HERE

For detailed setup steps, see: https://gitlab-mcp.pyja.in/installMake sure to replace YOUR_PAT_HERE in the prompt with your actual GitLab Personal Access Token before sending.
Your PAT is sent in plaintext in the chat message and may be stored in chat history. For long-term use, prefer the Manual Setup path which writes the token to a local config file instead of pasting it into chat.
This is a self-hosted internal service connected to your GitLab instance at https://gitlab.com. No third-party SaaS or external services are involved.
Manual Setup
Follow the steps below for your AI assistant.
- Open your Open WebUI and click the ⚙️ Settings icon (your profile avatar in the sidebar)
- Click Integrations in the settings sidebar
- Under Manage tool servers, click + Add a tool server
- Select OpenAPI as the server type
- Enter a Name (e.g.,
gitlab) - Enter the URL:
https://gitlab-mcp.pyja.in/openapi - Set Auth to Bearer
- Paste your GitLab access token from the previous step into the token field
- Click Save
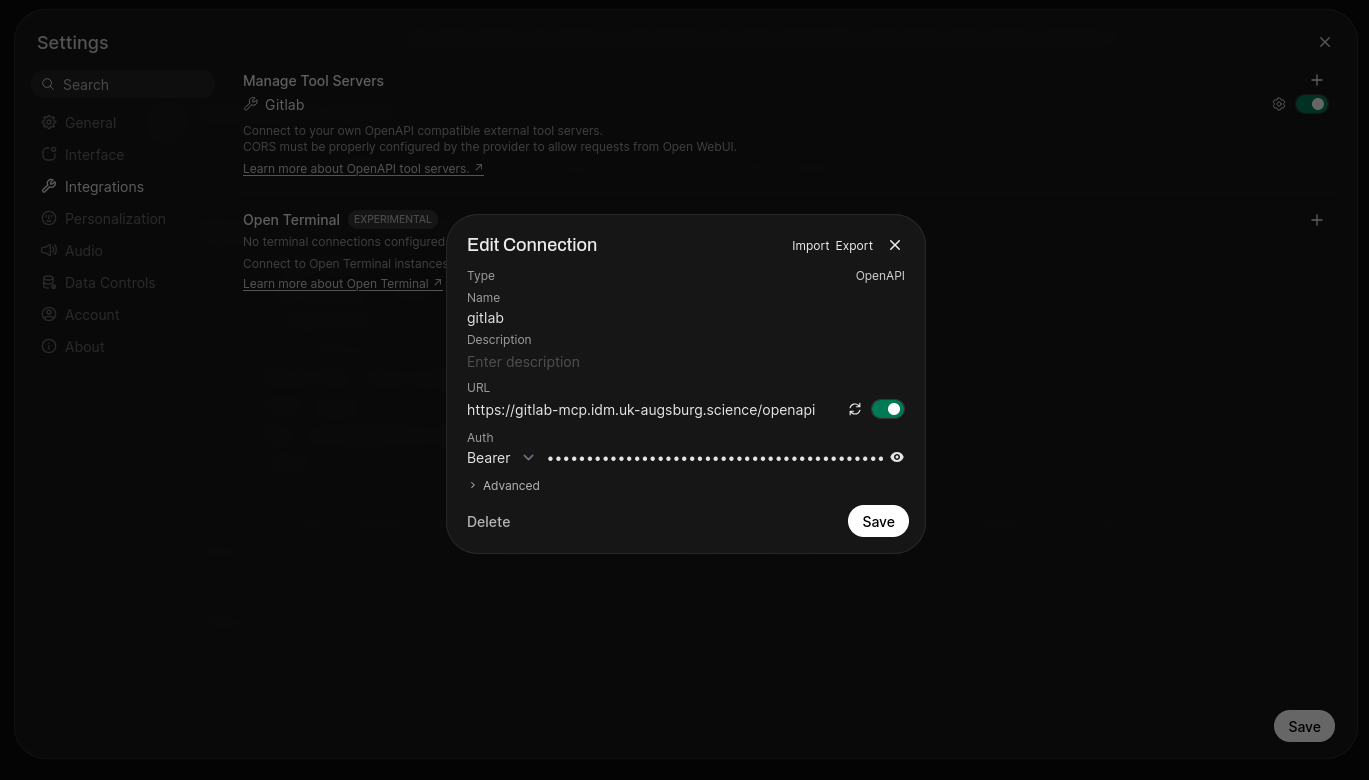
After saving, you should see the GitLab tools listed on the Tools page. Start a new chat and try asking about a project — if the AI can answer with real data, you're all set!
Add this to your opencode.json configuration file:
{
  "mcp": {
    "gitlab": {
      "type": "remote",
      "url": "https://gitlab-mcp.pyja.in/mcp",
      "enabled": true,
      "oauth": false,
      "headers": {
        "Authorization": "Bearer YOUR_PAT_HERE"
      }
    }
  }
}
Replace YOUR_PAT_HERE with the token you created in the previous step.
Run opencode mcp list after saving to check that the connection works.
Recommended — add to .mcp.json (project) or ~/.claude.json (user):
{
  "mcpServers": {
    "gitlab": {
      "type": "http",
      "url": "https://gitlab-mcp.pyja.in/mcp",
      "headers": {
        "Authorization": "Bearer YOUR_PAT_HERE"
      }
    }
  }
}
Alternative — use the CLI:
claude mcp add --transport http gitlab https://gitlab-mcp.pyja.in/mcp \
--header "Authorization: Bearer YOUR_PAT_HERE"The CLI --header flag has known issues in some Claude Code versions and may not persist the auth header. If the CLI method doesn't work, use the .mcp.json approach above.
Replace YOUR_PAT_HERE with your GitLab PAT.
Add to your Cursor settings (Cmd/Ctrl + , → MCP):
{
  "mcpServers": {
    "gitlab": {
      "type": "streamable-http",
      "url": "https://gitlab-mcp.pyja.in/mcp",
      "headers": {
        "Authorization": "Bearer YOUR_PAT_HERE"
      }
    }
  }
}
Replace YOUR_PAT_HERE with your GitLab PAT.
Add to your Cline MCP settings. The type field is required — without it, Cline defaults to SSE transport which will fail with a 405 error.
{
  "mcpServers": {
    "gitlab": {
      "type": "streamableHttp",
      "url": "https://gitlab-mcp.pyja.in/mcp",
      "headers": {
        "Authorization": "Bearer YOUR_PAT_HERE"
      }
    }
  }
}
Replace YOUR_PAT_HERE with your GitLab PAT.
Skills
Optional skills enhance your AI assistant's ability to work with GitLab. Click a skill to view details, or install them using npx skills.
List available skills:
npx skills add https://gitlab-mcp.pyja.in/skills.git --listInstall all skills:
npx skills add https://gitlab-mcp.pyja.in/skills.git --all -gnpx skills add https://gitlab-mcp.pyja.in/skills.git --allInstall a specific skill:
npx skills add https://gitlab-mcp.pyja.in/skills.git --skill gitlab-researcher -gnpx skills add https://gitlab-mcp.pyja.in/skills.git --skill gitlab-solver -gnpx skills add https://gitlab-mcp.pyja.in/skills.git --skill gitlab-reviewer -gAfter installing skills, restart your AI assistant so the new skills are loaded. Skills are loaded on-demand by the agent when the context calls for them.
Troubleshooting
- Make sure you entered the
/openapiendpoint (e.g.,https://gitlab-mcp.pyja.in/openapi), not the base URL or/mcp - Try refreshing the Tools page in Open WebUI settings
- Remove and re-add the server — sometimes the connection needs a fresh start
- Check that your token has the
apiscope (not justread_apiif you're trying to write) - Verify your GitLab role on the project — you need at least Maintainer for write actions
- Make sure the token hasn't expired
- The server creates short-lived project tokens for git operations. This requires Maintainer+ role on the project.
- If you only have Developer access, the server returns a structured error by default (
PAT_FALLBACK=disabled). SetPAT_FALLBACK=enabledto fall back to using your PAT directly. - If fallback is disabled, ask your GitLab maintainer to grant you Maintainer role on the project.
- Use the full project path:
group/project-name - Check that you have at least Reporter access to that project in GitLab
- Try listing your projects first: "List all my projects"